When the user clicks a link, pushes a button, or types on the keyboard we want to know about it. These user actions all raise DOM events. In this chapter we learn to bind to those events using the Angular Event Binding syntax.
Binding to User Input Events
We can listen to any DOM event with an Angular Event Binding.
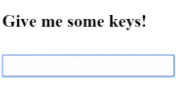
The syntax is simple. We assign a template expression to the DOM event name, surrounded in parentheses. A click Event Binding makes for a quick illustration.
The (click) to the left of the equal sign identifies the button's click event as the target of the binding.
The text within quotes on the right is the "template expression" in which we
respond to the click event by calling the component's onClickMe method. A template expression is a subset
of JavaScript with a few added tricks.
When writing a binding we must be aware of a template expression's execution context. The identifiers appearing within an expression belong to a specific context object. That object is usually the Angular component that controls the template ... which it definitely is in this case because that snippet of HTML belongs to the following component:
The onClickMe in the template refers to the onClickMe method of the component.
When the user clicks the button, Angular calls the component's onClickMe method.
Get user input from the $event object
We can bind to all kinds of events. Let's bind to the "keyup" event of an input box and replay what the user types back onto the screen.
This time we'll (1) listen to an event and (2) grab the user's input.
Angular makes an event object available in the $event variable
which we pass to the component's onKey() method.
The user data we want is in that variable somewhere.
The shape of the $event object is determined by whatever raises the event.
The keyup event comes from the DOM so $event must be a standard DOM event object.
The $event.target gives us the
HTMLInputElement which
has a value property and that's where we find our user input data.
We had this in mind when we passed $event to our onKey() component method. This is where we extract the user's input and
concatenate it to the previous user data that we're accumulating in the component's values property.
We then use interpolation
to display the accumulating values property back on screen.
Enter the letters "abc", backspace to remove them, and we should see:
We cast the $event as an any type which means we've abandoned strong typing
to simplify our code. We generally prefer the strong typing that TypeScript affords.
We can rewrite the method, casting to HTML DOM objects like this.
Strong typing reveals a serious problem with passing a DOM event into the method:
too much awareness of template details, too little separation of concerns.
We'll address this problem in our next try at processing user keystrokes.
Get user input from a local template variable
There's another way to get the user data without the $event variable.
Angular has a syntax feature called local template variables. These variables grant us direct access to an element. We declare a local template variable by preceding an identifier with a hash/pound character (#).
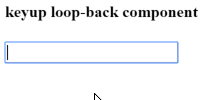
Let's demonstrate with a clever keystroke loopback in an ultra-simple template.
We've declared a template local variable named box on the <input> element.
The box variable is a reference to the <input> element itself which means we can
grab the input element's value and display it
with interpolation between <p> tags.
The template is completely self contained. It doesn't bind to the component which does nothing.
Type in the input box and watch the display update with each keystroke. Voila!
This won't work at all unless we bind to an event.
Angular only updates the bindings (and therefore the screen) if we do something in response to asynchronous events such as keystrokes.
That's why we bind the keyup event to an expression that does ... well, nothing.
We're binding to the number 0, the shortest expression we can think of.
That is all it takes to keep Angular happy. We said it would be clever!
That local template variable is intriguing. It's clearly easier to get to the textbox with that
variable than to go through the $event object. Maybe we can re-write our previous
"key-up" example using the variable to acquire the user's input. Let's give it a try.
That sure seems easier.
An especially nice aspect of this approach is that our component code gets clean data values from the view.
It no longer requires knowledge of the $event and its structure.
Key event filtering (with key.enter)
Perhaps we don't care about every keystroke.
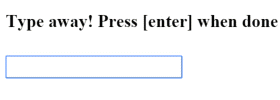
We're only interested in the input box value when the user hits the "Enter" key. We'd like to ignore all other keys.
When we bind to the (keyup) event, our event handling expression hears every key stroke.
We could filter the keys first, examining every $event.keyCode, and update the values property only if the key is "Enter".
Angular can filter the key events for us. Angular has a special syntax for keyboard events.
We can listen for just the "Enter" key by binding to Angular's keyup.enter pseudo-event.
Only then do we update the component's values property ...
inside the event expression rather than in the component ...
because we can ... even if it is a dubious practice.
Here's how it works.
On blur
Our previous example won't transfer the current state of the input box if the user mouses away and clicks
elsewhere on the page. We only update the component's values property when the user presses "Enter"
inside the input box.
Let's fix that by listening to the input box's blur event as well.
Put it all together
We learned how to display data in the previous chapter. We've acquired a small arsenal of event binding techniques in this chapter.
Let's put it all together in a micro-app that can display a list of heroes and add new heroes to that list by typing in the input box and hitting "Enter", clicking "Add", or clicking elsewhere on the page.
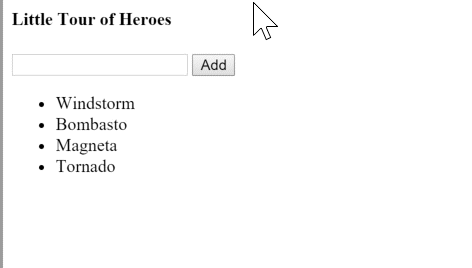
Below is the "Little Tour of Heroes" component. We'll call out the highlights after we bask briefly in its minimalist glory.
We've seen almost everything here before. A few things are new or bear repeating.
newHero template variable
The newHero template variable refers to the <input> element.
We can access newHero from any sibling or child of the <input> element.
When the user clicks the button, we don't need a fancy CSS selector to
track down the textbox and extract its value.
Extract the input box value
We could have passed the newHero into the component's addHero() method.
But that would require addHero to pick its way through the <input> DOM element,
something we learned to dislike in our first try at a KeyupComponent.
Instead, we grab the input box value and pass that to addHero().
The component knows nothing about HTML or DOM which is the way we like it.
Don't let template expressions be complex
We bound (blur) to two JavaScript statements.
We like the first one that calls addHero.
We do not like the second one that assigns an empty string to the input box value.
We did it for a good reason. We have to clear the input box after adding the new hero to the list. The component has no way to do that itself — because it has no access to the input box (our design choice).
Although it works, we are rightly wary of JavaScript in HTML. Template expressions are powerful. We're supposed to use them responsibly. Complex JavaScript in HTML is irresponsible.
Should we reconsider our reluctance to pass the input box into the component?
There should be a better third way. And there is as we'll see when we learn about NgModel in the Forms chapter.
Source code
Here is all the code we talked about in this chapter.
Next Steps
We've mastered the basic primitives for responding to user input and gestures. As powerful as these primitives are, they are a bit clumsy for handling large amounts of user input. We're operating down at the low level of events when we should be writing two-way bindings between data entry fields and model properties.
Angular has a two-way binding called NgModel and we learn about it
in the Forms chapter.