Tour of Heroes: the vision
Our grand plan is to build an app to help a staffing agency manage its stable of heroes. Even heroes need to find work.
Of course we'll only make a little progress in this tutorial. What we do build will have many of the features we expect to find in a full-blown, data-driven application: acquiring and displaying a list of heroes, editing a selected hero's detail, and navigating among different views of heroic data.
The Tour of Heroes covers the core fundamentals of Angular. We’ll use built-in directives to show/hide elements and display lists of hero data. We’ll create a component to display hero details and another to show an array of heroes. We'll use one-way data binding for read-only data. We'll add editable fields to update a model with two-way data binding. We'll bind component method to user events like key strokes and clicks. We’ll learn to select a hero from a master list and edit that hero in the details view. We'll format data with pipes. We'll create a shared service to assemble our heroes. And we'll use routing to navigate among different views and their components.
We’ll learn enough core Angular to get started and gain confidence that Angular can do whatever we need it to do. We'll be covering a lot of ground at an introductory level but we’ll find plenty of links to chapters with greater depth.
The End Game
Here's a visual idea of where we're going in this tour, beginning with the "Dashboard" view and our most heroic heroes:
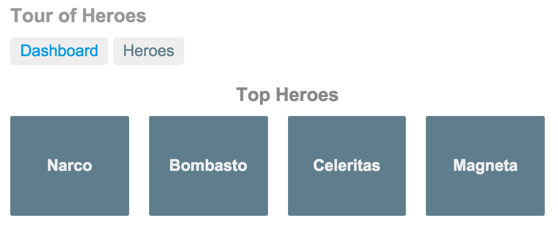
Above the dashboard are two links ("Dashboard" and "Heroes"). We could click them to navigate between this Dashboard and a Heroes view.
Instead we click the dashboard hero named "Magneta" and the router takes us to a "Hero Details" view of that hero where we can change the hero's name.
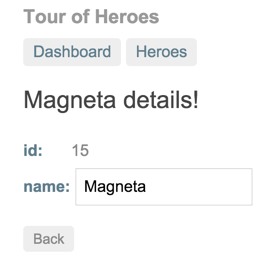
Links at the top can take us to either of the main views. We'll click the "Back" button which sends us to the "Heroes" master list view with "Magneta" as the selected hero.
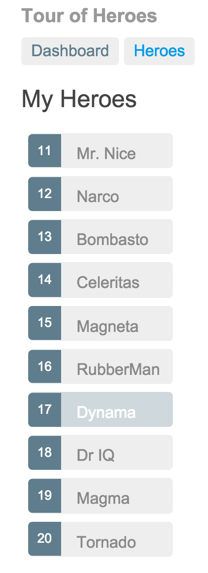
We click a different hero and the readonly mini-detail beneath the list reflects our new choice.
We click the "View Details" button to drill into the editable details of our selected hero.
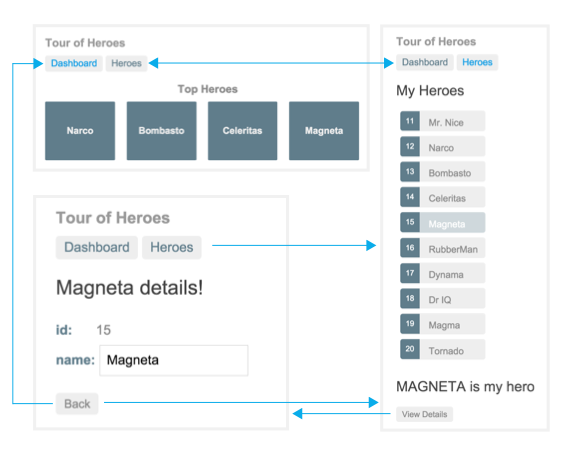
The following diagram captures all of our navigation options.
Here's our app in action
Up Next
We’ll build this Tour of Heroes together, step by step. We'll motivate each step with a requirement that we've met in countless applications. Everything has a reason.
And we’ll meet many of the core fundamentals of Angular along the way.