Every application starts out with what seems like a simple task: get data, transform them, and show them to users.
Getting data could be as simple as creating a local variable or as complex as streaming data over a Websocket.
Once data arrive, we could push their raw toString values directly to screen.
That rarely makes for a good user experience.
Almost everyone prefers a simple birthday date
(April 15, 1988) to the original raw string format
( Fri Apr 15 1988 00:00:00 GMT-0700 (Pacific Daylight Time) ).
Clearly some values benefit from a bit of massage. We soon discover that we desire many of the same transformations repeatedly, both within and across many applications. We almost think of them as styles. In fact, we'd like to apply them in our HTML templates as we do styles.
Welcome, Angular pipes, the simple display-value transformations that we can declare in our HTML!
Using Pipes
A pipe takes in data as input and transforms it to a desired output. We'll illustrate by transforming a component's birthday property into a human-friendly date:
Focus on the component's template.
Inside the interpolation expression we flow the component's birthday value through the
pipe operator ( | ) to the Date pipe
function on the right. All pipes work this way.
Built-in pipes
Angular comes with a stock set of pipes such as
DatePipe, UpperCasePipe, LowerCasePipe, CurrencyPipe, and PercentPipe.
They are all immediately available for use in any template.
Learn more about these and many other built-in pipes in the the API Reference; filter for entries that include the word "pipe".
Parameterizing a Pipe
A pipe may accept any number of optional parameters to fine-tune its output.
We add parameters to a pipe by following the pipe name with a colon ( : ) and then the parameter value
(e.g., currency:'EUR'). If our pipe accepts multiple parameters, we separate the values with colons (e.g. slice:1:5)
We'll modify our birthday template to give the date pipe a format parameter. After formatting the hero's April 15th birthday should display as 04/15/88.
The parameter value can be any valid template expression such as a string literal or a component property. In other words, we can control the format through a binding the same way we control the birthday value through a binding.
Let's write a second component that binds the pipe's format parameter
to the component's format property. Here's the template for that component:
We also added a button to the template and bound its click event to the component's toggleFormat method.
That method toggles the component's format property between a short form
('shortDate') and a longer form ('fullDate').
As we click the button, the displayed date alternates between "04/15/1988" and "Friday, April 15, 1988".

Learn more about the DatePipes format options in the API Docs.
Chaining pipes
We can chain pipes together in potentially useful combinations.
In the following example, we chain the birthday to the DatePipe and on to the UpperCasePipe
so we can display the birthday in uppercase. The following birthday displays as
APR 15, 1988
If we pass a parameter to a filter, we have to add parentheses to help the template compiler with the evaluation order. The following example displays FRIDAY, APRIL 15, 1988
We can add parentheses to alter the evaluation order or to provide extra clarity:
Custom Pipes
We can write our own custom pipes.
Here's a custom pipe named ExponentialStrengthPipe that can boost a hero's powers:
This pipe definition reveals several key points
A pipe is a class decorated with pipe metadata.
The pipe class implements the
PipeTransforminterface'stransformmethod that takes an input value and an optional array of parameter strings and returns the transformed value.There will be one item in the parameter array for each parameter passed to the pipe
We tell Angular that this is a pipe by applying the
@Pipedecorator which we import from the core Angular library.The
@Pipedecorator takes an object with a name property whose value is the pipe name that we'll use within a template expression. It must be a valid JavaScript identifier. Our pipe's name isexponenentialStrength.
The PipeTransform Interface
The transform method is essential to a pipe.
The PipeTransform interface defines that method and guides both tooling and the compiler.
It is optional; Angular looks for and executes the transform method regardless.
Now we need a component to demonstrate our pipe.

Two things to note:
We use our custom pipe the same way we use the built-in pipes.
We must list our pipe in the @Component decorator's
pipesarray.
Angular reports an error if we neglect to list our custom pipe.
We didn't list the DatePipe in our previous example because all
Angular built-in pipes are pre-registered.
Custom pipes must be registered manually.
If we try the live code example, we can probe its behavior by changing the value and the optional exponent in the template.
Power Boost Calculator (extra-credit)
It's not much fun updating the template to test our custom pipe.
We could upgrade the example to a "Power Boost Calculator" that combines
our pipe and two-way data binding with ngModel.
Stateful Pipes
There are two categories of pipes, stateless and stateful.
Stateless pipes are pure functions that flow input data through without remembering anything or causing detectable side-effects.
Most pipes are stateless. The DatePipe in our first example is a stateless pipe. So is our custom ExponentialStrengthPipe.
Stateful pipes are conceptually similar to classes in object-oriented programming. They can manage the data they transform. A pipe that creates an HTTP request, stores the response and displays the output, is a stateful pipe. Pipes that retrieve or request data should be used cautiously, since working with network data tends to introduce error conditions that are better handled in JavaScript than in a template. We can mitigate this risk by creating a custom pipe for a particular backend and bake-in the essential error-handling.
The stateful AsyncPipe
The Angular Async pipe is a remarkable example of a stateful pipe. The Async pipe can receive a Promise or Observable as input and subscribe to the input automatically, eventually returning the emitted value(s).
It is stateful because the pipe maintains a subscription to the input and its returned values depend on that subscription.
In the next example, we bind a simple promise to a view with the async pipe.
The Async pipe saves boilerplate in the component code.
The component doesn't have to subscribe to the async data source,
it doesn't extract the resolved values and expose them for binding,
and (in the case of Obsevable stream sources like EventEmitter)
the component doesn't have to unsubscribe when it is destroyed
(a potent source of memory leaks).
Implementing a Stateful Pipe
Pipes are stateless by default.
We must declare a pipe to be stateful
by setting the pure property of the @Pipe decorator to false.
This setting tells Angular’s change detection system to
check the output of this pipe each cycle, whether its input has changed or not.
Here's how we'll decorate our new stateful FetchJsonPipe that
makes an HTTP fetch request and (eventually) displays the data in the server's response:
Immediately below we have the finished pipe. Its input value is an url to an endpoint that returns a JSON file. The pipe makes a one-time async request to the server and eventually receives the JSON response.
Next we demonstrate this pipe in a test component whose template defines two bindings
The component renders like this:
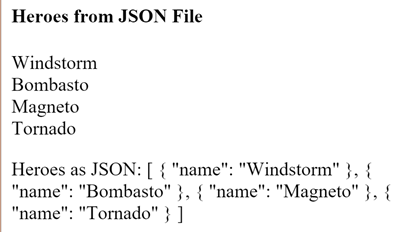
The first binding is straight forward. An ngFor repeater displays the hero names fetched from a json source file.
We're piping the literal file name, "heroes.json", through to the custom fetch pipe.
JsonPipe
The second binding uses more pipe chaining.
We take the same fetched results and display the raw hero data in JSON format
by piping to the built-in JsonPipe.
The JsonPipe is an easy way to diagnosis a mysteriously failing data binding.
Here's the complete component implementation:
Next Steps
Pipes are a great way to encapsulate and share common display-value transformations. We use them like styles, dropping them into our templates expressions to enrich the appeal and usability of our views.
Explore Angular's inventory of built-in pipes in the API Reference. Try writing a custom pipe and perhaps contributing it to the community.